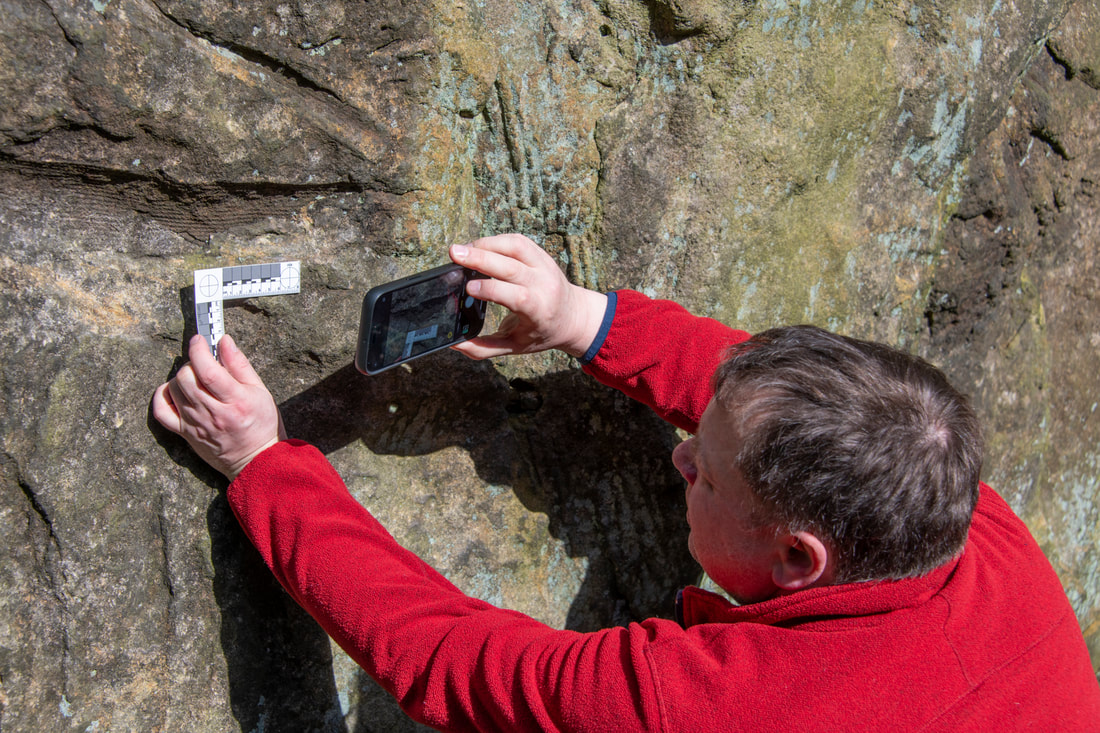
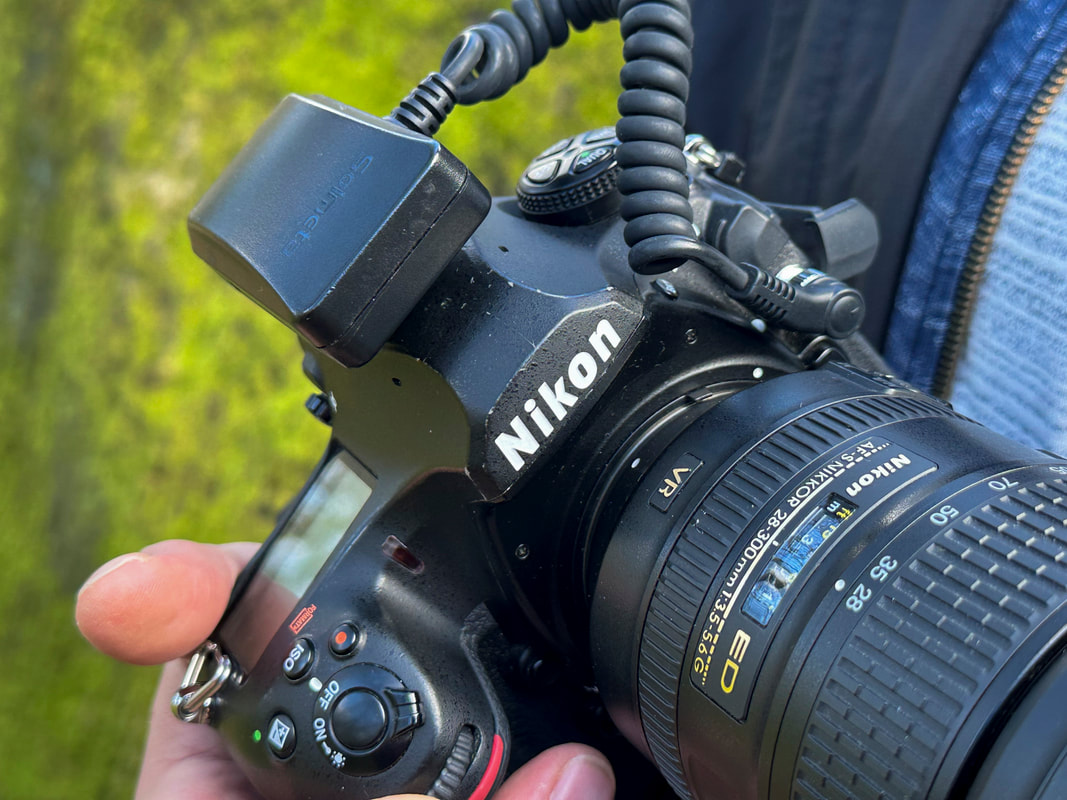
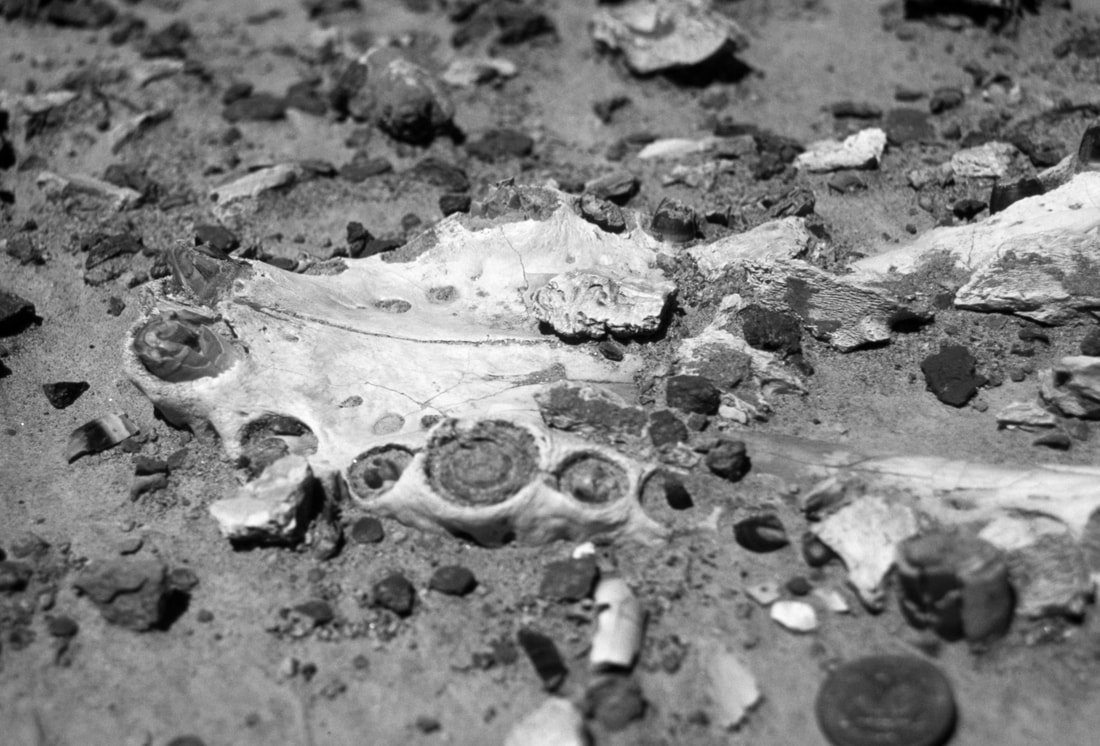
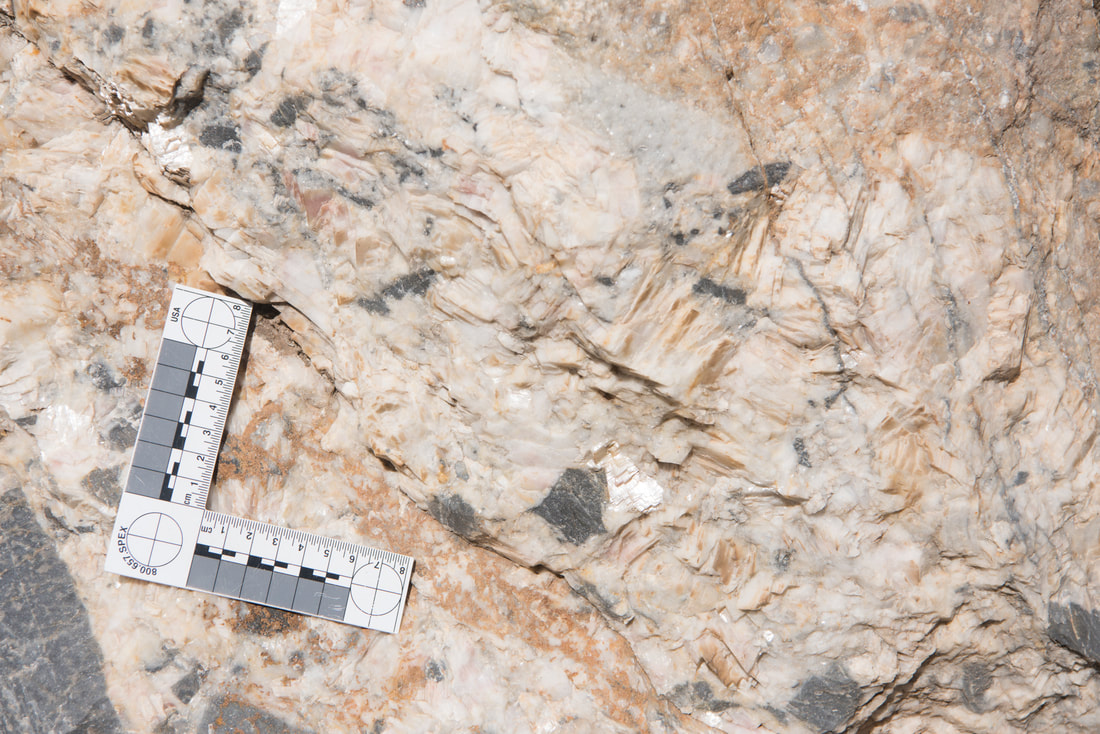
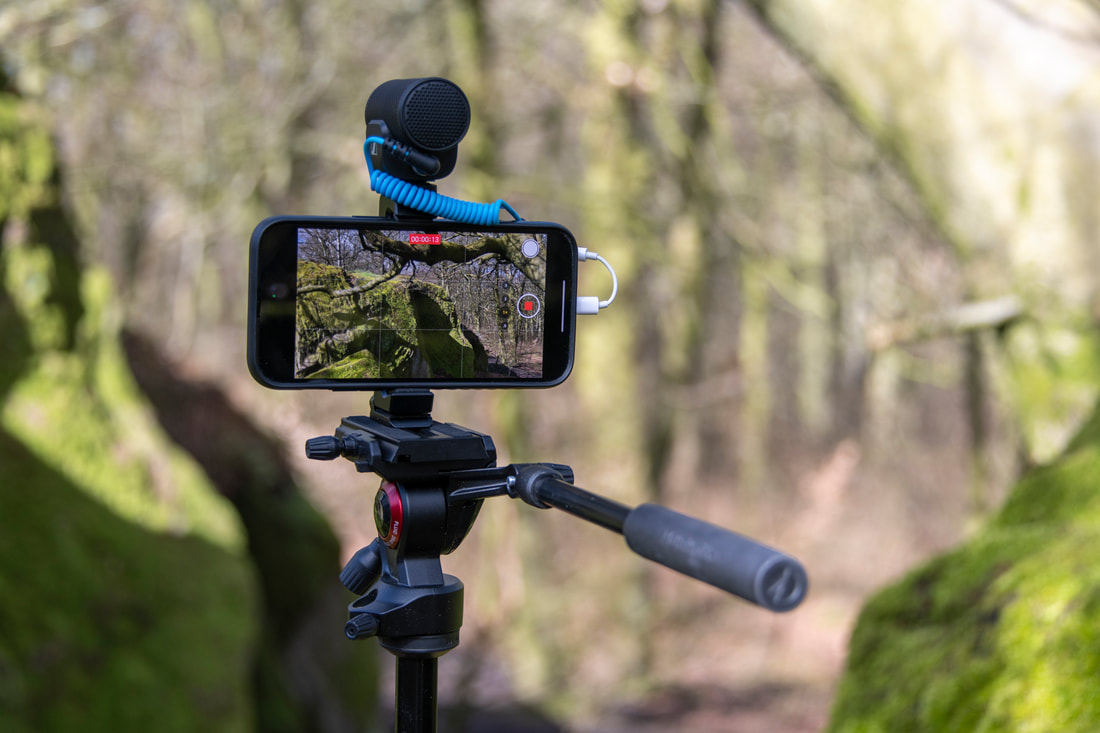
A Guide to Taking Geological Field Photos. 2. What Kit do I Need? Paul Markwick Fieldwork is an integral part of science and especially the Earth sciences. Indeed, for many of us, getting out into the 'field' is the main reason why we became geologists in the first place. Central to fieldwork is making and recording primary observations. For this photography is a key tool. Back in 2020, I wrote a blog with ten tips for field photography. This formed the basis for two online workshops during the UK's second lockdown in 2021. Two questions kept coming up, (1) what photographic field kit did I use? and (2) is a phone camera good enough for field photography? In this blog I provide some answers to both these questions by describing my fieldwork experience and some of the field photography equipment I use. Hopefully, you will find this of use. Photographic equipment can be quite personal, and I am sure many of you will have your own preferences. It is also a question of budget. Of course, for many of you for whom photography is a hobby and not just a tool, you will want to have equipment that enables you to take great photographs as well as recording what you see. The best starting place for considering field gear is to ask a very simple question: "Why do we need a camera for fieldwork?" The answer to that question takes us back to why we do fieldwork at all. The answer is to make and record primary observations in the real world. So the objective of fieldwork photography is to capture information so that you can communicate your observations. 1. Cameras or Smart Phones? Digital technology has changed photography enormously over the last 20 years. For fieldwork, these changes have definitely been for the better. No longer are we limited by the number of pictures we can take (24 or 36 per roll multiplied by how many rolls of film we can afford or fit in our day bags), nor do we have to wait a week or more to see the results. Which camera you use is as much about your budget and experience as anything else. In choosing your camera, the best advice is to list the key features you need, such as sensor resolution, size, and price. Then, check this list against what is on offer. There is a considerable amount of help now available online. YouTube has a range, but I can recommend Ken Rockwell's excellent review site, https://kenrockwell.com/index.htm, or Digital Photography Review, https://www.dpreview.com/. I have used both in the past, especially Ken's website. Once you have a shortlist, there is nothing better than going into a store, getting the 'feel' of the cameras on your list, and making a decision from this. You can then also get the advice of the experts in the store. If the price is an issue, why not check second-hand deals from reputed camera stores? My go-to DSLR is a Nikon D810 (https://www.dpreview.com/products/nikon/slrs/nikon_d810/specifications), which I have now had since about 2015. This is a great camera, but relatively large and heavy. My decision here was based on several criteria: (1) I needed a high-resolution sensor because I was using the photos for professional applications, and I already knew that I would need to zoom into a photo and crop it to get the images I wanted; (2) a camera that was robust and weatherproofed (essential given where I take it); (3) one that would give me the flexibility to either allow the camera to make all the decisions or to allow me to have complete manual control; (4) that the camera was compatible with my existing camera gear. Another plus of this camera is its ability to capture HD video. But the last time I was in the field, which was May 2022 and my first trip abroad after the COVID pandemic, I left my trusted D810 at home and relied on my iPhone 11 Pro. This was something of an experiment. Most of us still take large digital SLR cameras into the field. But the cameras on phones are now so good that, in most circumstances, these will meet your needs and certainly be ideal for capturing your field sketches. The panorama mode on the iPhone is especially useful for capturing big-picture landscapes. Most digital cameras will record the location of each photo, especially if you are using a smartphone. But it is always worth noting the photos you have taken on your sketch – "panorama photograph," "detailed of this part of the outcrop," etc. Please remember to save your photos to the cloud or your computer. I use Dropbox and iCloud as additional backup insurance. Are Apple iPhones and other smartphones 'good enough'? Absolutely! 2. GPS The Someta Geotagger GPS attached to a Nikon DSLR. These are great little devices. However, please remember that you will need one specifically designed for your camera. Smartphones will have a GPS or WiFi-based locator built in. Depending on where in the field you are, this may or may not be adequate. However, if you are out in the 'boonies,' you may need a dedicated GPS, such as the Garmin GPSMAP 64s (https://buy.garmin.com/en-GB/GB/p/140022). There are also GPS units that will fit onto your DSLR camera. Most camera brands will have their branded accessories. I use a Solmeta Geotagger (http://www.solmeta.com/index.php/Product/show/id/2), which I have found to be excellent for the price. These will drain your camera battery, although not excessively so from experience (I can leave the GPS on automatic and only have to charge the batteries on my Nikon every few days, even after near-constant daily use). My only grumble with the Geotagger is that although it fits onto the flash shoe easily, it also tends to slide off easily as well. It would be great if there were a locking device of some form. If your DSLR has Bluetooth connectivity, you may also be able to link the GPS location information from your smartphone to the camera. 3. Camera straps If you are using a DSLR and are in the habit of having the camera constantly at hand, then a good camera strap is essential. I use the Blackrapid Sport Breath strap (http://www.blackrapid.com/Sport-Breathe), which fits and locks into the base of the camera body. This is extremely comfortable, with the exception of the "underarm stabilizer" strap that fits under your armpit and is a pain, literally. I removed it without noticing any problems. For your smartphone, a pocket will do! 4. Photographic Scales Scales are important. Coins, pencils, and lens caps are all very well and good and look nice and retro in a presentation, but they all vary in size. Today it is easy to buy a scale from the USGS, other geological stores, or, as I do, from a crime scene supplier. I have a set for different feature sizes to reflect the different extents of photos. What is useful for close-up photography is some indication of distortion on the scale - a circle divided into quarters. Alligatorid fossil jaw from the Eocene Washakie Basin, Wyoming. The scale here is a US quarter piece (out of focus – another thing to consider when using scales) in the bottom right. Coins were a standard scale in field photography but suffered from several limitations, (1) they vary in size, (2) they are highly reflective, which can cause exposure problems, (3) should the coin be head side up (in the UK all coins had the Queen's head, so which coin was in the photograph was not always clear)and always top up in the photograph? Mineral vein associated with brittle deformation in Devonian carbonates, Gistain, central Pyrenees. Here using a right-angle scale, with a circle that can be used to assess photographic distortion of the image. 5. Memory Cards, Hard-drives, and Cases Memory cards now come in various formats for DSLR cameras, from SD, mini SD, XD, and compact flash (CF). But, of course, what you will need depends on your camera. There are even more brands to choose from. I use SanDisk SD and CF cards and have had no major problems with these. SanDisk Extreme PRO 32 GB SDHC Memory Card, Up to 95 MB/s, Class 10, U3, V30 How many cards you buy and which brand will also depend on your budget, as with so much else in today's blog guide. Although memory card technology is relatively tried and tested, and problem cards are rare, I tend not to use anything bigger than a 64GB card. This mitigates the risks due to card failure and/or card loss. An alternative approach is to download directly to a portable hard drive in the field. Whatever storage system you use, you can further mitigate the risk of loss by uploading your photos to the cloud or backup device each evening. With the ready availability of cloud storage and access to WiFi, you should be able to do this relatively easily. This is where smartphones can be handy if this is your primary photographic tool by having photos uploaded to the cloud whenever in 4G or WiFi range. The only issue here is the data usage cost, so check your provider's data usage policy and charges. 6. Battery Packs If you are using your iPhone or Samsung phone for photography and especially if taking video, then you should invest in a battery pack that you can take with you in case your phone needs a recharge in the field. I use an Anker powerbank. 7. Lenses If you have a DSLR, this opens up a range of lens options. But, again, this will be limited by budget and packing space if you are traveling. A good quality wide-angle to-zoom lens such as a 24-70mm is a good balance for most field applications. You might also want to consider a macro lens if you expect to do much close-up work. If so, then you will also want a suitable lighting system. In the past, outcrop photos usually necessitated the use of a wide-angle lens, with the problems of distortion, but this is now mitigated by the ability to build panoramas. I use the 24mm in portrait mode with at least a 30% overlap. Some cameras and most phones will have an excellent automatic panorama generator, which is a helpful solution. There may be occasions when you want to zoom into an outcrop distant from you. For example, I will sometimes take a 70-300mm with me if I have space, but this is heavy, and for long trips in the field this weight must be taken into consideration. With high-resolution cameras, you can also zoom in by cropping during processing if you do not have the necessary telephoto lens. With megapixel sizes of 32MP now very common on DSLRs, this is more than feasible. 8. Tripods A tripod is helpful but not essential, given the greater control digital cameras have over ISO, without the increase in graininess that blighted film. For travel, I use the lightweight Manfrotto Beefree. This tripod is great, and I can highly recommend this. However, this may not be suitable if you have a large DSLR and lens. These lightweight travel tripods are not the cheapest (and seem to have gone up in price substantially since I bought mine) so do check out the second-hand market and sales. If you are worried about a lightweight tripod being affected by strong winds, especially if you are in the mountains, then consider using your backpack to further stabilize a tripod by hanging it below the head. This provides more mass. The alternative to these lightweight travel tripods is a full-size professional tripod, but these will increase the weight you carry in the field, so bear this in mind. A few years back, one of my brothers gifted me a smartphone clamp for my iPhone. Brilliant! I use this fitted to a Manfrotto MVH400AH Befree Live Fluid Head and the BeeFree tripod for shooting my new series of videos. This is the setup I use for videos. An iPhone connected to a Sennheiser MKE 200 directional microphone on a Manfrotto BeeFree tripod. For narration, I use a Røde SmartLav+ lapel microphone rather than the Sennheiser. 9. Lighting With most DSLRs and phone cameras, low lighting is much less of an issue than it was, say, when I made my undergraduate field trips 30+ years ago (ok, perhaps nearer 40 years ago). By increasing the ISO on your camera, you can still get relatively sharp results. Of course, this will depend on your camera, and some are better than others. Alternative options include long shutter speeds with the camera on a tripod or using artificial lighting. If you are doing this professionally, I am sure you will already have a range of flash guns you will take. Although for everyday field work, this will be an additional weight to carry – and a drain on your battery supply! If you plan on taking close-ups of rock surfaces, you might consider a macro (ring) flash unit that fits on the front of your DSLR lens. A range of 3rd party units is available (check out Amazon or Wex Photo). 10. Camera bags The problem is that you will be going into field areas with rocks, which by definition, are not good for cameras. So you need to ensure that when carrying a camera, it has plenty of protection but is also easily accessible. I have traditionally used a Lowepro camera bag, and I can recommend Lowepro in general. However, a few years back, I tried a Crumpler bag. Bright red and extremely simple (one compartment), this has actually ended up being my favorite bag for day trips in the field. However, it must be said that it is not ideal for major hiking expeditions when I return to the Lowepros! 11. Software Most smartphones will include their own software where you can run a selection of processing. For advanced processing, consider using software such as Adobe Lightroom, which to me, is the best software for post-production and managing digital photographs. There are student pricing solutions available. If you have Lightroom, you won't need any other software (it now even has a panorama building extension). 12. Notebooks Your camera is only one part of your toolkit. A camera does not replace the need for a notebook and pencils; indeed, you will want to keep track of your photographs in your notebook! My personal notebook preference is still the Chartwell 2006Z top-opening survey book . Although this lacks the waterproofing and useful look-up information at the back of the Rite in the Rain Geological Notebooks, I particularly like the fact that I can open up the Chartwell notebook in landscape orientation, which gives me two pages for sketches. The 2006Z version also has two parallel lines, which provide great reference lines for sketching and logging when in portrait view. Ensure that your notebook is a bright color in case you leave it on an outcrop and you need to find it again from a distance. Bright yellow or orange are easier to spot! The general guidance from most field geologists is to use a pencil in the field and to generate an "inked-in version" each evening. This has the benefit of ensuring you have two copies of your notes. However, with good-quality cameras on most smartphones today, an alternative or additional safeguard is to photograph your day's notes and save this to the cloud. Final Thoughts As I said at the outset of this article, what photographic equipment you use in the field is very much down to your budget and personal preference. Is an iPhone or other smartphone good enough for most student field trips? Absolutely! Whether you use a DSLR or phone, remember about lighting, scales, and the need for context, a 'big picture' shot to capture the context and details of the rock units, fossils, and structures. I hope this short article has been helpful. I would love to learn about your field kit experiences and recommendations. Have fun! A pdf version of this blog is available for download here
0 Comments
|
AuthorDr Paul Markwick Archives
November 2023
Categories |
|
Copyright © 2017-2024 Knowing Earth Limited
|
E-mail: contact@knowing.earth
|

